This week of work was mostly considered to be fixing past errors from before or refining something from previous iterations.
HDRI FIXES
First I set my sights on fixing the HDRI from before. I forgot to take off the levels adjustment I placed on the image to paint out the tripod and shadow, thus making the image much darker. I fixed this problem quickly by just deleting the layer and exporting the corrected version.

Exporting the HDRI out as a PNG to use for this blog has severely darkened the image.
PHOTOSCANS
Now after that I took another stroll out to Tybee Island, GA to take another, higher quality, photoscan of the beach. Hopefully the plan is to place a small layer of sand over the top of the geometry and sell that there is a large amount of sand. Thus saving on sim times later on….hopefully.


RENDER LAYERS
REFLECTION
Finally my last item this week was starting with pipeline and render passes. Starting to get these laid out for the compositor is going to be vital to the finishing of this project.
I started working with getting reflections of the water onto the car as a proof of concept. This was completed by simply placing surface shaders onto the ground, projecting the rendered frame from the camera of the water renders form FX onto the ground plane. Thus giving the reflection of the water onto the bottom of the car.

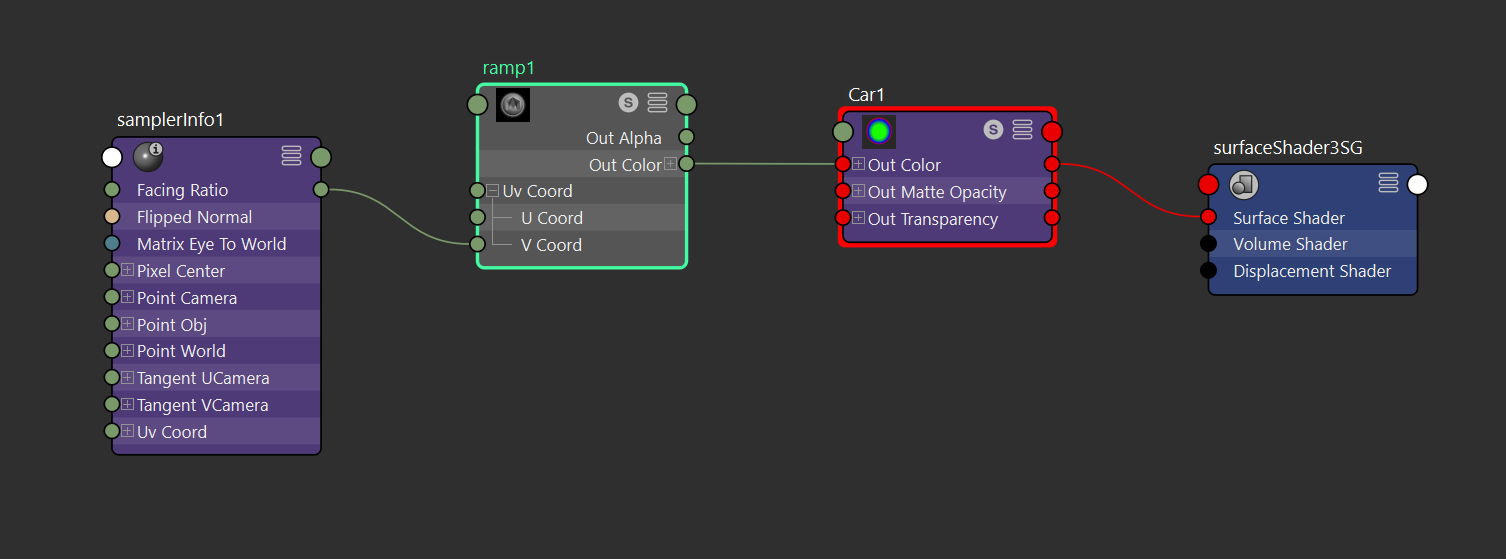
FRESNEL
After this I started working with Fresnel. Allowing the compositor to easily pick how much reflection/refraction is going to really help sell this as photorealistic.


This will allow the Compositor the select the color value they wish to use as a selection. Therefore changing the reflections of lets say green less, because it is facing the camera more, or having red have more reflection because it is facing the most level with the camera.
This was done by placing a Maya Surface Shader on the car and plugging a ramp into the Color Out. Plugging the Facing Ratio from the “SamplerInfo” node into the V coordinates of the Ramp gives this effect on the car. Allowing the compositors job a little easier.
TO DO:
Next on my list of things to do is gather rocks for the foreground and get those into the light rig, as well as the compositor is getting a list of objects she wants grouped together for different Render Layers using roughly the same method as with Fresnel, but with solid colors instead.